Month: November 2020
How to Create Beautiful Animations in Your Android App: Motion Layout
Why add animation to your app?
The benefits of animation don’t end on them just pleasing the user’s eye: an animation is also a tool that explains the app’s logic to the user. For example, it can add visual guides or show when the app’s state is changing.
A great example of this is the classic loader you see everywhere, from video players to mobile apps. A loader helps a user understand that their request is being processed and that they need to wait a little until the app loads.
Without a loader, the user experience becomes confusing: the user doesn’t know whether the app is loading or is just frozen.
The devil is in the details, and small animations are one of them. In this article, we’ll describe one way to add beautiful animations to your Android app.
How to animate an Android app
There are many APIs that help developers integrate animations into an Android app. Your choice of API depends on what type of animation you need. Here are the main tools for Android animations:
- AnimatedVectorDrawable
- Property Animation framework
- LayoutTransition
- TransitionManager
- CoordinatorLayout
- MotionLayout
In this article, we’ll talk about one of these animation tools: MotionLayout.
MotionLayout is a subclass of ConstraintLayout and has all its capabilities. On top of that, MotionLayout controls the motion and animation of widgets. With MotionLayout, you can also resize and animate the interface elements users interact with.
The layout allows you to describe the transition between two layouts with the help of TransitionManager as well as animate any attribute. It also supports keyframes and touch processing, which helps you set up transitions between screens according to your needs.
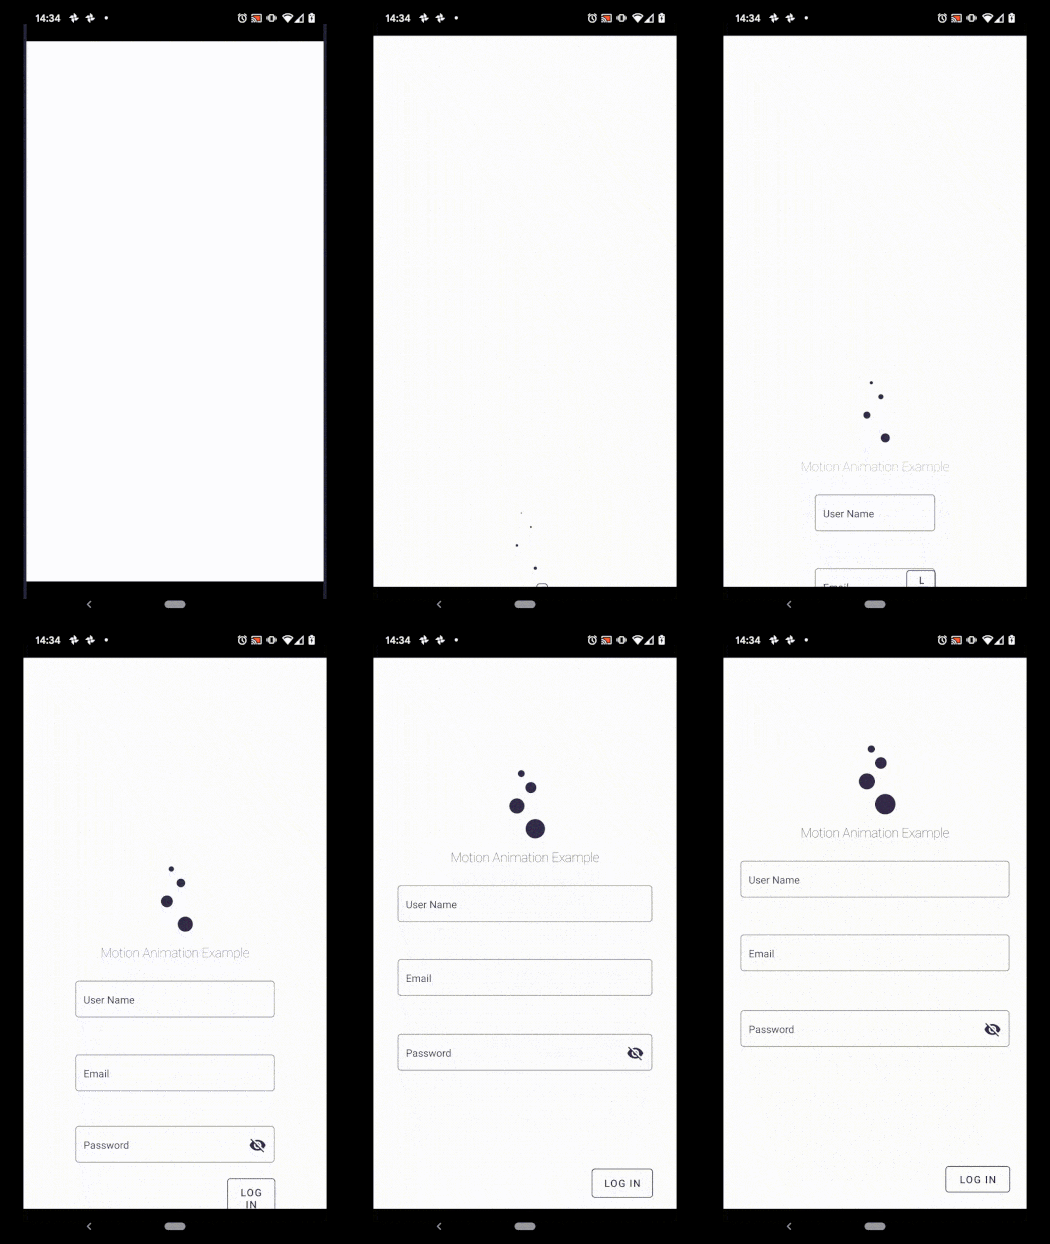
Now let’s dive into the details. I implemented an animation on this screen using MotionLayout:

To understand the principles of how this animation works, let’s begin with the layout itself. The root container in this layout is MotionLayout. This container works only with its direct child elements, and it doesn’t support a nested layout hierarchy.
Because the layout is a descendant of ConstraintLayout, the elements are placed in the same way as in ConstraintLayout. The main difference is that there’s an attribute called app:layoutDescription. This attribute addresses the XML file that describes the MotionScene animation. Without this attribute, the layout may be displayed with errors.
In my example, the XML file stores the attributes that define how elements are placed in the container. I could easily delete these attributes because there are default attributes in the initial state of MotionScene that can define the element placement instead.
<androidx.constraintlayout.motion.widget.MotionLayout xmlns:android="http://schemas.android.com/apk/res/android"
    xmlns:app="http://schemas.android.com/apk/res-auto"
    android:layout_width="match_parent"
    android:layout_height="match_parent"
    android:background="@android:color/white"
    app:layoutDescription="@xml/scene_auth"
    android:focusable="true"
    android:focusableInTouchMode="true">

    <androidx.constraintlayout.widget.Guideline
        android:id="@+id/guidLineAuth"
        android:layout_width="wrap_content"
        android:layout_height="wrap_content"
        android:orientation="vertical"
        app:layout_constraintGuide_percent="0.5" />

    <androidx.appcompat.widget.AppCompatImageView
        android:id="@+id/firstCircleAuth"
        android:layout_width="@dimen/indent_10"
        android:layout_height="@dimen/indent_10"
        android:src="@drawable/round_background_darck"
        android:layout_marginBottom="@dimen/indent_6"
        app:layout_constraintBottom_toTopOf="@id/secondCircleAuth"
        app:layout_constraintEnd_toStartOf="@id/guidLineAuth"
        app:layout_constraintTop_toBottomOf="@id/guidLineTop"
        app:layout_constraintVertical_chainStyle="packed"/>

  ...

</androidx.constraintlayout.motion.widget.MotionLayout >
I mentioned earlier that an XML file describes the animation. To be more precise, it stores information about the initial and final states of a UI element.
The initial state describes how the element looks before the animation occurs, and the final state describes how it looks after the animation is complete. Our MotionLayout tool is responsible for animating the transition between the initial and final states in a certain timeframe.
Here’s the MotionScene file:
<MotionScene xmlns:android="http://schemas.android.com/apk/res/android"
    xmlns:motion="http://schemas.android.com/apk/res-auto">

    <Transition
        motion:autoTransition="animateToEnd"
        motion:constraintSetEnd="@+id/end"
        motion:constraintSetStart="@+id/start"
        motion:duration="2000">
    </Transition>
    <ConstraintSet android:id="@+id/start">

        <Constraint
            android:id="@id/firstCircleAuth"
            android:layout_width="@dimen/indent_10"
            android:layout_height="@dimen/indent_10"
            android:layout_marginBottom="@dimen/indent_6"
            android:scaleX="0"
            android:scaleY="0"
            android:src="@drawable/round_background_darck"
            motion:layout_constraintBottom_toTopOf="@id/secondCircleAuth"
            motion:layout_constraintEnd_toStartOf="@id/guidLineAuth"
            motion:layout_constraintTop_toBottomOf="parent"
            motion:layout_constraintVertical_chainStyle="packed" />
      ...
    </ConstraintSet>

    <ConstraintSet
        android:id="@+id/end"
        motion:transitionEasing="decelerate">

        <Constraint
            android:id="@id/firstCircleAuth"
            android:layout_width="@dimen/indent_10"
            android:layout_height="@dimen/indent_10"
            android:layout_marginBottom="@dimen/indent_6"
            android:scaleX="1"
            android:scaleY="1"
            android:src="@drawable/round_background_darck"
            motion:layout_constraintBottom_toTopOf="@id/secondCircleAuth"
            motion:layout_constraintEnd_toStartOf="@id/guidLineAuth"
            motion:layout_constraintTop_toTopOf="@id/guidLineTop"
            motion:layout_constraintVertical_chainStyle="packed" />
      …
  </ConstraintSet>

</MotionScene>
The main and most important elements here are Transaction and ConstraintSet.
- Transaction describes basic animation elements: the initial and final ConstraintSet for the transition, the animation duration in milliseconds, and the conditions that initiate the animation. These conditions can be automatic, by click, or by swipe.
- ConstraintSet defines a set of restrictions for our layout, meaning the rules of its positioning. These rules apply to both the layout itself and to one or several elements within it.
The object called Constraint inside ConstraintSet defines the view it constrains and also stores all the characteristics you want to apply to the widget.
The Constraint object stores this layout data:
- alfa
- visibility
- elevation
- rotation (x/y)
- scale (x/y)
- translation (x/y/z)
Note that if you set restrictions with the Constraint tag, you inherit all the restrictions from the parent set. However, there are special attributes that help you replace only certain characteristics or restrictions:
- CustomAttribute
- Layout
- PropertySet
- Transform
- Motion
Each MotionScene should have at least one Transaction and description of restrictions.
MotionLayout works by interpolating the values of a widget’s placement and size between the two states (initial and final) described in the ConstraintSet. This allows the layout to adapt to different screen sizes. In some cases, you may need an intermediate position that the animation should go through without stopping on it. For this, use KeyFrames.
KeyFrames allows you to set an element transformation at a given moment, while MotionLayout interpolates between two states. There are several kinds of KeyFrames:
- KeyPosition – sets the position of the element
- KeyAttribute – sets the element’s state (scale, alfa, etc.)
- KeyCycle – describes repeating actions of the element related to its position
- KeyTimeCycle – describes repeating actions of the element relative to time
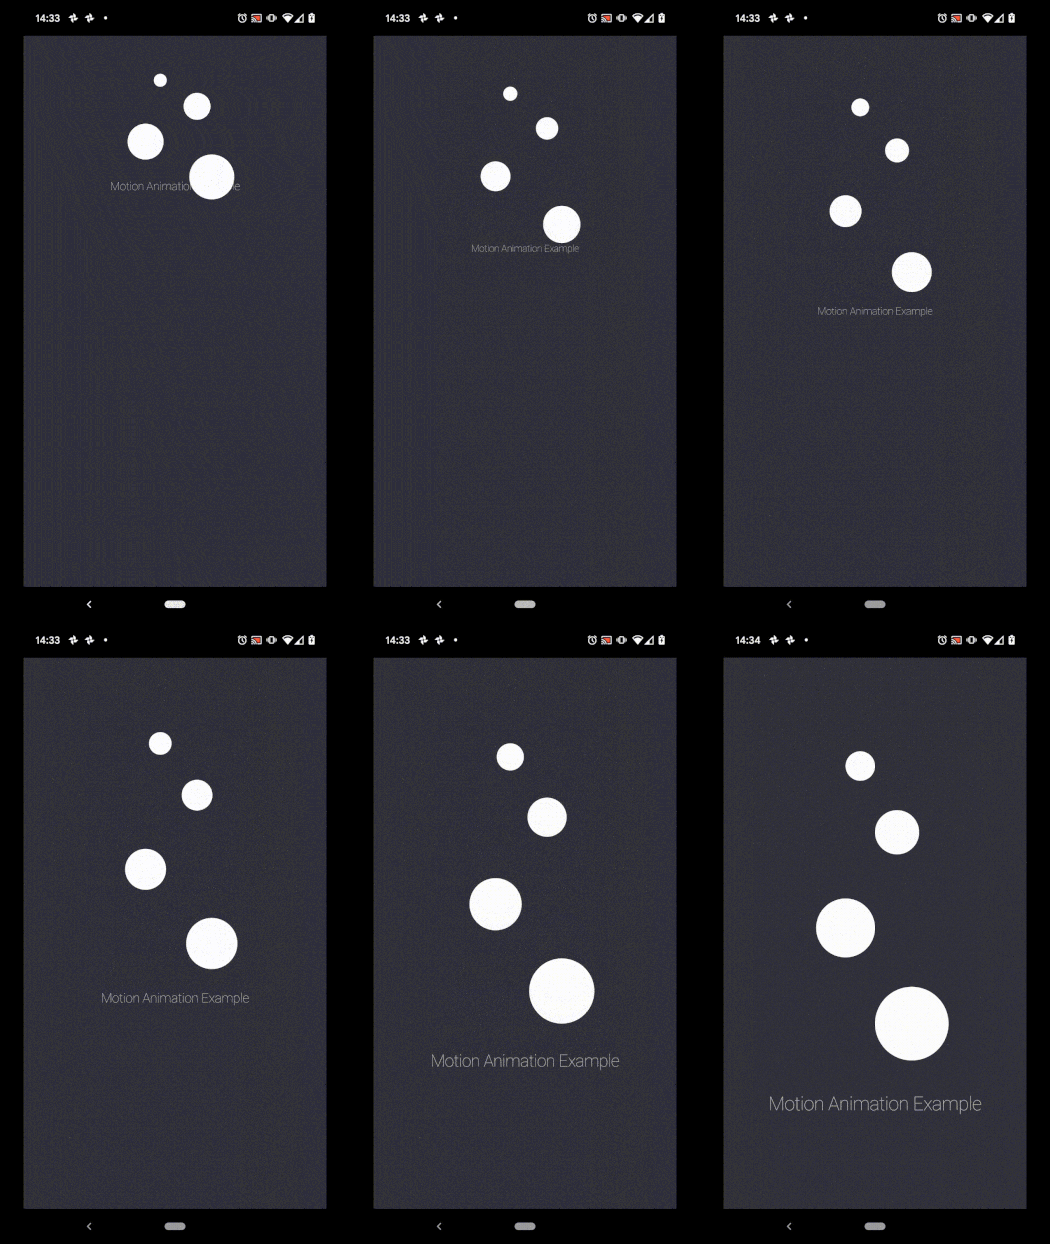
In my example, I used KeyFrames with the subtype KeyAttribute. I wanted views to get smaller until a 50% transition was made, then return to their initial size. It looks like this:

This is what the MotionScene file looks like:
<MotionScene xmlns:android="http://schemas.android.com/apk/res/android"
    xmlns:motion="http://schemas.android.com/apk/res-auto">

    <Transition
        motion:constraintSetEnd="@+id/end"
        motion:constraintSetStart="@+id/start"
        motion:duration="3000"
        motion:motionInterpolator="linear"
        motion:autoTransition="animateToEnd">

    <KeyFrameSet>
        <KeyAttribute
            android:scaleX="0.5"
            android:scaleY="0.5"
            motion:framePosition="20"
            motion:motionTarget="@id/firstCircle" />

        <KeyAttribute
            android:scaleX="0.5"
            android:scaleY="0.5"
            motion:framePosition="50"
            motion:motionTarget="@id/secondCircle" />
    ...

    </KeyFrameSet>

    </Transition>

    <ConstraintSet android:id="@+id/start">
        <Constraint
           android:layout_height="@dimen/indent_40"
           android:id="@id/firstCircle"
           android:src="@drawable/round_background"
           android:layout_marginBottom="@dimen/indent_40"
           motion:layout_constraintBottom_toTopOf="@id/secondCircle"
           motion:layout_constraintEnd_toStartOf="@id/guidLine"
           motion:layout_constraintVertical_chainStyle="packed"
           android:scaleX="1"
           android:scaleY="1"/>
   ...

</MotionScene>
As you can see, I added another object called KeyFrameSet to the Transaction object. To implement my idea, I needed to shrink the elements only halfway through the animation, and for this I added a KeyAttribute sub-object. Here’s what it consists of:
- android:scaleX and android:scaleY attributes to set the element’s scaling size
- motion:FramePosition for setting the exact time during the transition for a KeyFrame (from 0 to 100)
- motion:motionTarget is the id of the view to which the KeyFrame should apply
If I needed to perform any other actions with the elements — for example, change their position — I’d add a KeyPosition sub-object to the KeyFrameSet object.
There are cases when you’ll need to perform actions at different points of the animation flow: at the beginning, in the middle, or at the end. For this, use a TransitionListener interface. In my example, I need to start a new activity as the transition ends. For this, I start an activity right in the onTransitionCompleted method. Here’s how it looks in code:
class SplashActivity : BaseActivity(), MotionLayout.TransitionListener {

    override fun onCreate(savedInstanceState: Bundle?) {
        super.onCreate(savedInstanceState)
        setContentView(R.layout.activity_splash)
        container_splash.setTransitionListener(this)
    }

    override fun onTransitionTrigger(p0: MotionLayout?, p1: Int, p2: Boolean, p3: Float) {}

    override fun onTransitionStarted(p0: MotionLayout?, p1: Int, p2: Int) {}

    override fun onTransitionChange(p0: MotionLayout?, p1: Int, p2: Int, p3: Float) {}

    override fun onTransitionCompleted(p0: MotionLayout?, p1: Int) {
        startActivity(intentFor())
        finish()
    }
}
Another MotionLayout capability worth mentioning is programmable animation launch. It’s possible to set the layout transition with the help of these methods:
- transitionToState(id) – sets the layout transition to a particular state
- transitionToStart(), transitionToEnd() – sets the transition to a target state till the beginning or the end of a transition
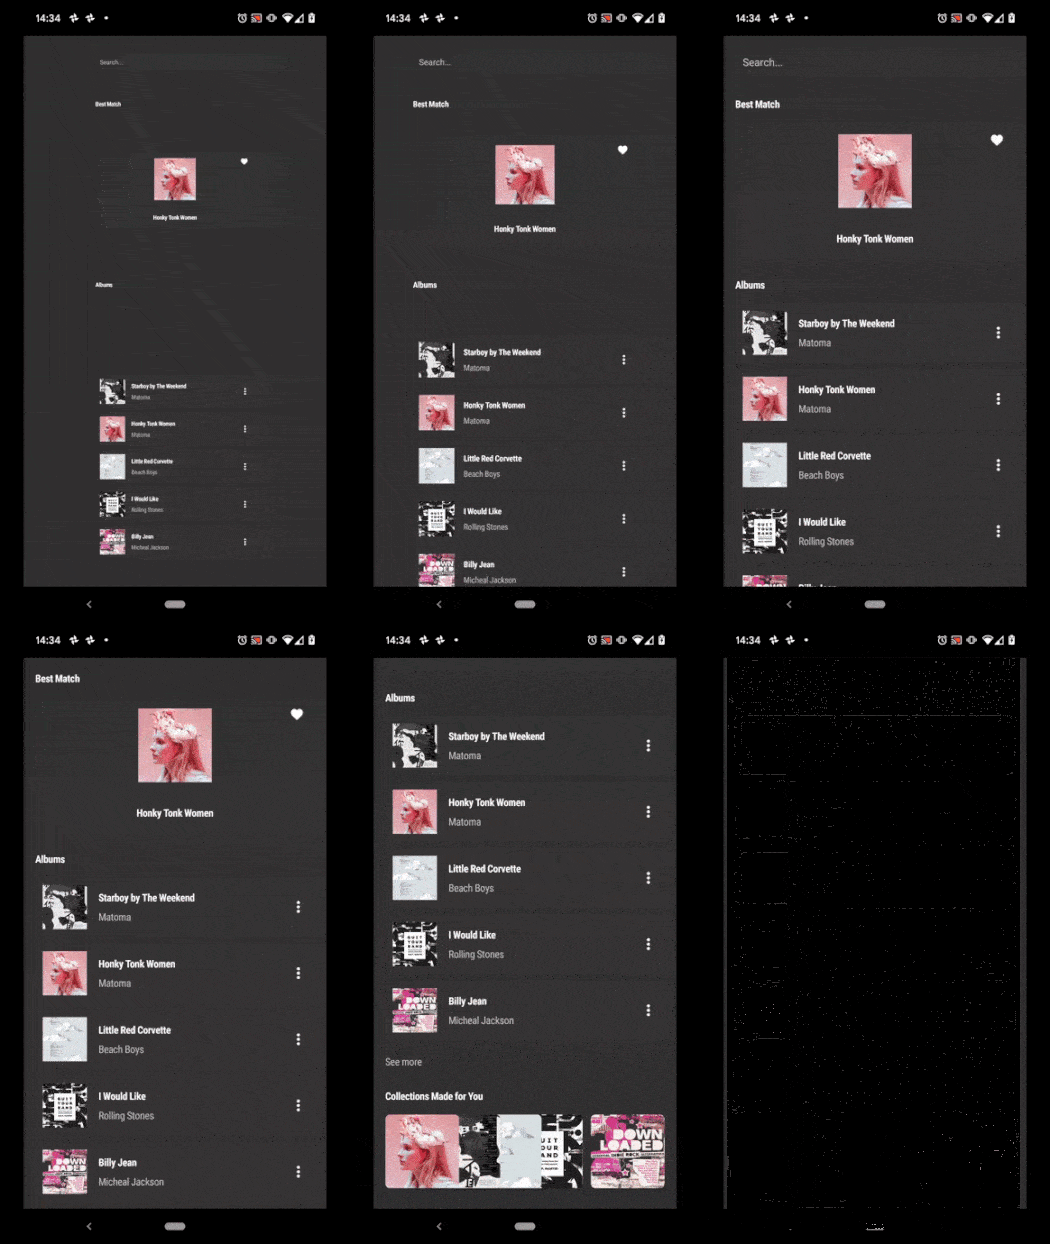
In my example, I needed to make the elements appear and animate them after scrolling down.

I didn’t add anything new to the MotionScene XLM apart from an additional ConstraintSet object, where I set restrictions for the lower blocks. Here you can have a look at my fragment class:
class MainFragment : Fragment(){

  ...

    override fun onViewCreated(view: View, savedInstanceState: Bundle?) {
        super.onViewCreated(view, savedInstanceState)
        setupRecyclerView()
        nested_scroll_view.setOnScrollChangeListener { v: NestedScrollView, scrollX: Int,            scrollY: Int, oldScrollX: Int, oldScrollY: Int ->
            if(scrollY == (v.getChildAt(0).measuredHeight - v.measuredHeight) &&                                      motion_main_container.currentState != R.id.end_image_set){

               motion_main_container.transitionToState(R.id.end_image_set)

          }
       }
    }

  ...
}
As you can see, after a certain condition is met, we just make our layout transition to the necessary state using transitionToState.
These are all the basic tools you need to use MotionLayout.
Final thoughts
MotionLayout is a very convenient tool for animating Android applications. It’s rather easy to integrate, and it allows a developer to set the whole animation process in an XML file, saving lots of time and reducing the amount of code.
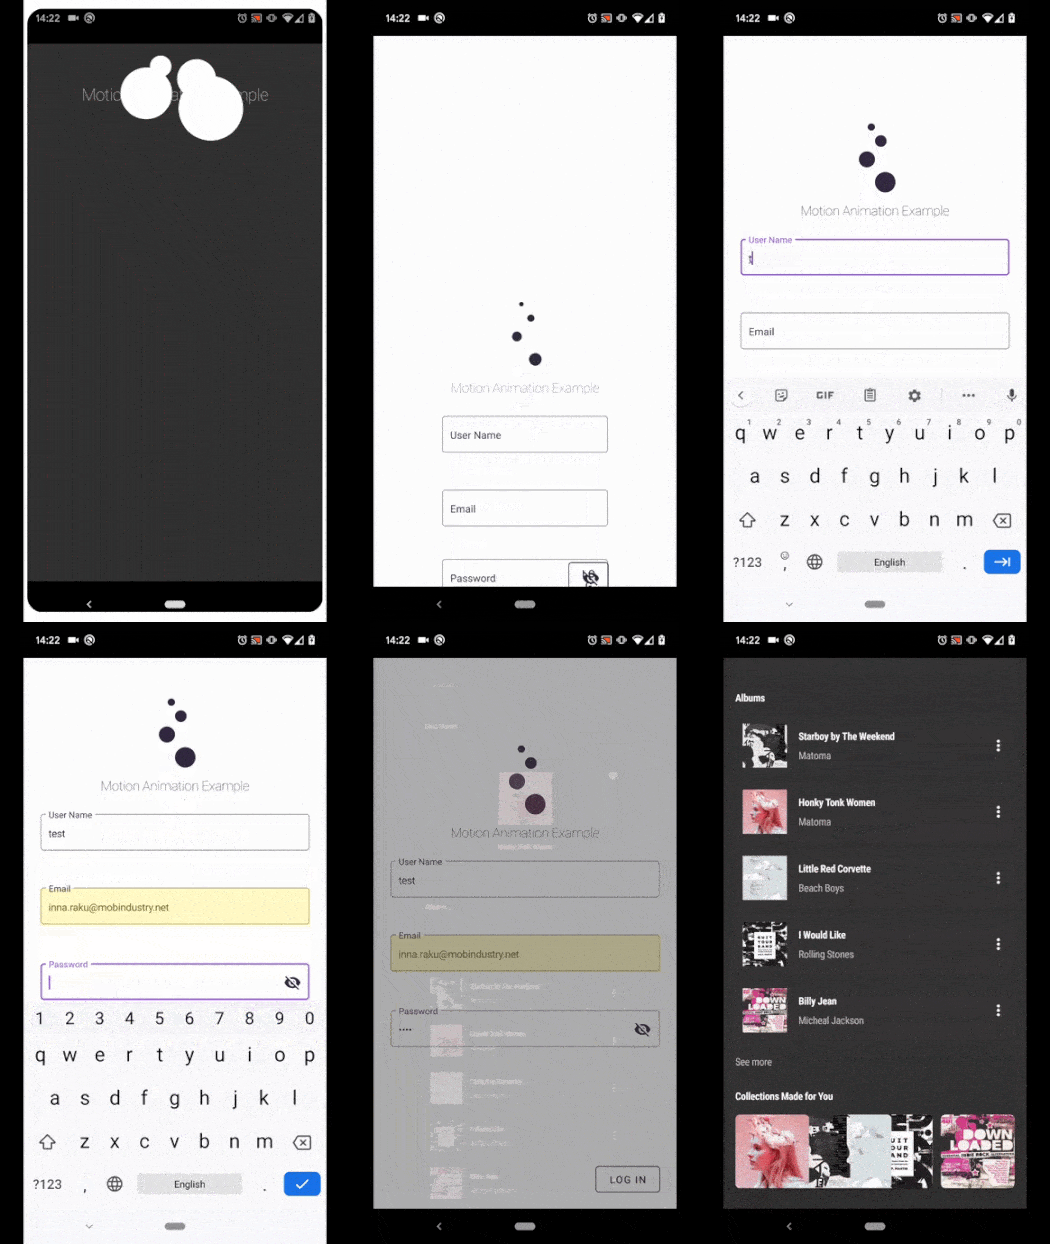
The MotionLayout is convenient to use when you need to reposition the elements, change their size, or animate elements of the user interface. Without any significant effort, I created this beautiful and smooth animation:

I’ve only mentioned the basic features of MotionLayout in this article. The MotionLayout library is currently in beta, so it’s possible you’ll run into some flaws. However, when I created this animation I didn’t face any problems. I definitely recommend MotionLayout for animating your Android application.

