How to Implement Rich Push Notifications in Your Ecommerce App
Push notifications have proven to be the most powerful tool for keeping users in mobile applications, reminding them to use an app and provoking interest. They’re especially useful for ecommerce companies.
Introduction
The reason they are so popular among ecommerce apps, is their ability to notify your users about discounts, new products, and promo codes.
However, there’s a way to make these messages even more effective for businesses – by integrating rich push notifications into ecommerce apps. Why are rich push notifications better than regular ones? Mainly because they’re more beautiful, engaging, and informative. It takes less time to process visual information (and people like it better), so expressive rich pushes that feature videos, photos, and gifs convey your messaging more effectively. The number of users who open apps through rich messages is significantly higher than the number who open apps through normal ones, according to Urban Airship. You should definitely build your app with this in mind.
This article consists of two parts. In the first part, we’ll tell you how to integrate a push notification into ecommerce app for iOS platform.
If you already have regular push messages implemented and your question is how to make a rich push notification, then you can jump right to our second tutorial.
How to Implement Push Notifications in a Mobile App
Before you create a push message for mobile app, you should decide how you’ll send them from server – cloud service or your own admin panel. At Mobindustry, we offer both options to our clients. We use the Firebase framework for cloud-based systems.
While the price for developing your own admin panel may seem too high at first, using cloud services can cost more money in the long term. It’s good for startups to use cloud services to test an app first, then build an admin panel if necessary.
Whatever you choose, you’ll need to use service bases. In the case of push notifications for Android, you’ll need Connect Google Message Cloud; for iOS, you’ll need APNs for push notifications for iOS.
Here are detailed instructions on how to add push notifications to ecommerce app.
Create a developer account
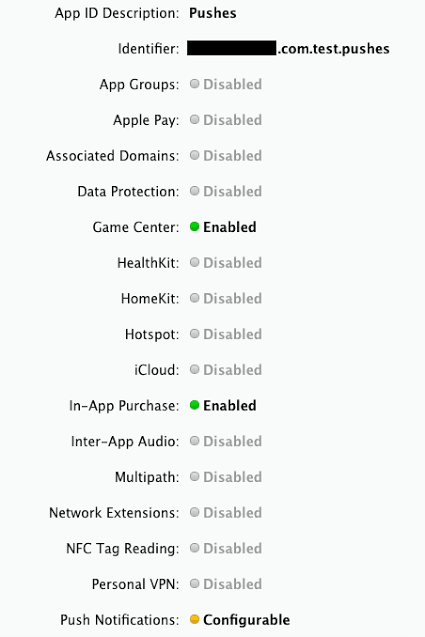
The first thing we need to do is enable push messages for our App ID and generate push certificates.
When creating a new App ID (or editing an existing one), check the Push Notifications box so this feature becomes configurable.

Once your App ID has been created, select it from the list and click Edit. Now you’ll see an option for creating SSL certificates. Create both Development and Production certificates, then download and install them.
How to Implement Rich Push Notifications
Rich messages consist of three main parts: the rich notification payload, the rich notification handler, and Provisioning Profiles.
1) Payload
The payload has exactly the same format as the payload for regular ones except for some new parameters:
"aps": {
			"alert": "Push notification message goes here",
			"sound": "default",
			"badge": 1,
			"userInfo" : {
				"imageType" : "jpg",
				"imageKey" : "https://hsto.org/getpro/habr/post_images/e4b/067/b17/e4b067b17a3e414083f7420351db272b.jpg"
			},
			"mutable-content": 1
		}
The main thing we need to pay attention to in this model is the mutable-content flag. This flag determines if the messages are rich. The mutable-content flag should be located inside the aps section and nowhere else, and should be set to 1. Setting this flag to 0 will (obviously) make your message a regular push notification, not a rich push one.
There are also two fields in the userInfo field. The userInfo field can be used for passing any custom data, so several associated values can be passed there. In the example above it’s imageType and imageKey, which represent the type of rich content and the link to this content.
2) Handler
To handle rich messages we need to add a new target to our project in Notification Service Extension:


Xcode will create a template file called NotificationService with a callback that will be called each time a message is received. This callback allows you to format rich content before it’s shown to user:

Here’s an example handler for the rich push payload we’re using:
- (void)didReceiveNotificationRequest:(UNNotificationRequest *)request withContentHandler:(void (^)(UNNotificationContent * _Nonnull))contentHandler {
    //Store handler and content while downloading is in progress
    self.contentHandler = contentHandler;
    self.bestAttemptContent = [request.content mutableCopy];

    //Get userInfo contents
    NSDictionary *userInfo = [[request content] userInfo];

    //Get rich content values
    NSString *richContentType = userInfo[@"aps"][@"imageType"];
    NSString *richContentUrl = userInfo[@"aps"][@"imageKey"];

    //Download rich content
    NSURL *url = [[NSURL alloc] initWithString:richContentUrl];

    __weak typeof(self) weakSelf = self;

    NSURLSession *session = [NSURLSession sessionWithConfiguration:[NSURLSessionConfiguration defaultSessionConfiguration]];
    [[session downloadTaskWithURL:url
                completionHandler:^(NSURL *temporaryFileLocation, NSURLResponse *response, NSError *error) {
                    if (error != nil) {
                        NSLog(@"%@", error.localizedDescription);
                    } else {
                        NSString *fileType = [NSString stringWithFormat:@".%@", richContentType];
                        NSString *fileName = [[temporaryFileLocation.path lastPathComponent] stringByAppendingString:fileType];

                        //Move downloaded image to temporary location
                        NSString *temporaryDirectory = [NSTemporaryDirectory() stringByAppendingPathComponent:fileName];
                        [[NSFileManager defaultManager] moveItemAtPath:temporaryFileLocation.path toPath:temporaryDirectory error:&error];

                        NSURL *imageUrl = [NSURL fileURLWithPath:temporaryDirectory];

                        //Initialise notification attachment with downloaded image
                        NSError *attachmentError = nil;
                        UNNotificationAttachment *attachment = [UNNotificationAttachment attachmentWithIdentifier:@""
                                                                                                              URL:imageUrl
                                                                                                          options:nil
                                                                                                            error:&attachmentError];
                        if (attachmentError) {
                            //Something went wrong, handle error
                            NSLog(@"%@", attachmentError.localizedDescription);
                        }

                        //Add attachment to notification content
                        weakSelf.bestAttemptContent.attachments = [NSArray arrayWithObject:attachment];

                        //Notify system that attachment is ready to be shown to user
                        weakSelf.contentHandler(weakSelf.bestAttemptContent);

                        //Delete temporary file to clear memory
                        [[NSFileManager defaultManager] removeItemAtPath:temporaryDirectory error:&error];
                    }
                }]
     resume];
}
As a result of the sample code above, an image will be downloaded from the link and attached to our message.
Here are a couple of things to take into account regarding images:
- Don’t use large images. iOS limits memory usage for rich messages (to about 1 MB), and if you try to download a large image the system will terminate the NotificationService and will show the message without rich content. For the same reason, you need to delete downloaded images from the temporary directory when they’re no longer needed.
- iOS adjusts images when they’re being shown, so only square images with a 1:1 aspect ratio will be fully shown. If the aspect ratio is 2:1, for example, the image will be cropped on both sides.
3) Provisioning profiles
Rich notifications use regular certificates, so if you already have regular pushes set up in your project, there’s no need to create new certificates.
However, Provisioning profiles are required as we’ve added a new target. We’ll need regular Development and Distribution profiles just like for any other target/project.
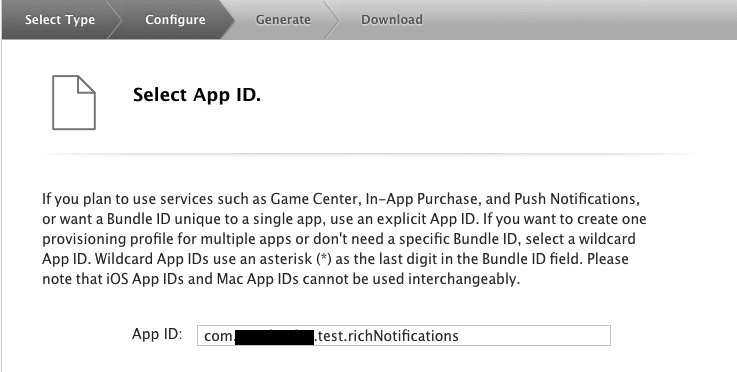
To set up Provisioning profiles, the first step is to create an App ID for your new target. Inside the developer portal, select Identifiers -> App IDs and click +. Enter any name for your new target and fill in the bundle ID, which is used in Xcode for the Notification Service Extension.

Once the App ID has been created, the only thing left is the Provisioning profile. Create both Development and Production profiles using the new App ID.

Finally, download and install your new Profiles. Xcode will recognize them automatically and assign the new target.

Conclusion
That’s it! Now you know how to create a push notification and rich push notifications for an iOS mobile app.
We hope that these instructions are useful for you. If you have any questions left for our developers on integration of notifications into mobile app, don’t hesitate to contact us for more information or tell us how we did in the comments below.
Article written by: Pavel Peday

